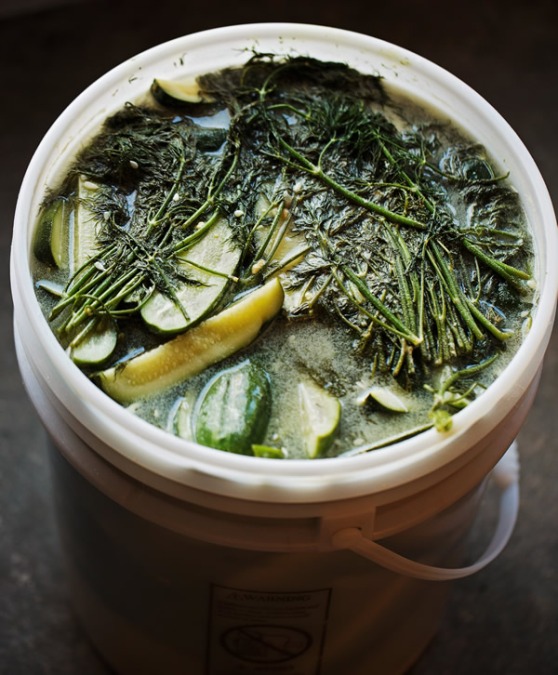
Dill-Mustard Pickles from Baking by Hand

Dill-Mustard Pickles from Baking  by Hand

Andy has loved pickles since he was a kid, and he was over-the-moon excited when he realized we could custom-make them for the bakery. It’s one of his favorite things that we prepare from scratch, and even though they’re not difficult, they represent one of those little things that make our humble sandwich station unique. Many local farm stands carry pickling cucumbers throughout the summer, and it’s best to use those instead of regular slicing cukes. They’re firmer and have fewer seeds, thus allowing them to stand up to an acidic brine much better. Or better yet, pick a variety of vegetables to brine. Again, firmer ones work better, so it’s a great way to preserve carrots, green beans, cauliflower, or other surprise bumper-crop items from your garden.

Keep in mind that these aren’t lacto-fermented pickles; they’re when we call a quick pickle. This is when brines based on vinegar, water, salt, sugar, and herbs or spices are poured over your vegetable of choice and left to soak under refrigeration. They’ll be ready in as little as 24 hours, but will become stronger and more flavorful a few days after that. These are the types of pickles Andy is  obsessed with. Go big or go home, as the old saying goes.

Each recipe of brine is made to cover about 2 lb of produce, depending on how they’re sliced. Thin-sliced “chips” will pack a jar tighter than spears or chunks, for example. A couple of experiments will inform you as to your favorite option.

Always use hot water, and dissolve your salt and sugar before adding the vinegar. Add your spices to the heated brine, and pour over the vegetables. Cool and store, covered, in your refrigerator. Eat after 24 hours, enjoy for a few weeks after that. Or, for longer storage pack into sterilized mason jars, follow standard canning procedure, and keep them on your shelf.

Dill-Mustard Pickles from Baking by Hand

Makes 3 or 4 pint jars, depending on cut used

  • 2 lbs pickling cucumbers or firm vegetables of your choice
  • 1 small bunch fresh dill
  • 5 1/2 cups white wine vinegar
  • 4 1/2 cups hot water
  • 1/3 cup kosher salt
  • 2/3 cup granulated sugar
  • 1/4 cup mustard seeds
  • 2 tbsp ground mustard

Cut your vegetables and layer them with the dill in a 1-gallon container, or divide among 3 or 4 pint jars if you’re planning on keeping them in your canning pantry. Dissolve the sugar and salt in the hot water, then add the vinegar and spices to the brine. If you’re going with bulk storage, pour the brine over the vegetables, cool and store, covered, in your refrigerator for at least 24 hours before eating. If you’re using the pint jars, pour the brine into each individual container and process in a boiling hot water bath for 10 minutes before cooling.

Cornmeal-Pumpkin Hearth Bread

Cornmeal-Pumpkin-Hearth-Bread

As soon as school starts in the fall, we begin fielding calls from customers asking when this bread will be back on the shelves. It has a limited life cycle in the bakery, as we bake it during the couple of months when we can source the pumpkins from nearby farms.

Notice that we call for corn flour, which has a finer grind than cornmeal and absorbs liquid better, resulting in a smoother final crumb. You can find it in specialty grocery stores and online.

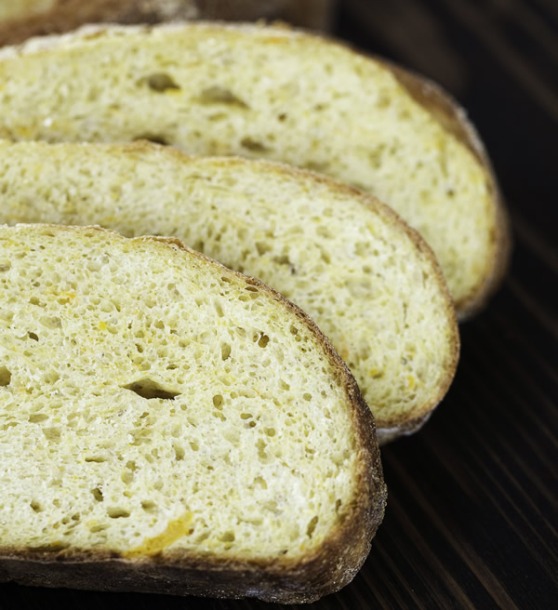
This bread has a sweet, moist, and tighter crumb than some of the other breads we make, and the crust has a bit more give. It makes amazing toast and grilled cheese sandwiches, its yellow hue crisping to a beautiful golden in the pan. You can easily shape these into loaf pans for more convenient sandwich slices; we make them as pumpkinesque rounds.

Note: If you do not have bannetons (the coiled cane molds that bakers use), you can use a
large mixing bowl lined with a smooth cotton dish towel.

Cornmeal-Pumpkin Hearth Bread
The Farm Stand Special

Overview
Yield: Three 1 lb 10 oz loaves
Desired Dough Temperature: 85˚F
Mixing Time: 40 minutes
Bulk Fermentation: ~2 hours
Proofing Time: ~2 hours
Baking Time: ~25 minutes
Cooling Time: ~1 hour

12 Hours Before the Bake
Mix your poolish
15 oz 75˚F water
15 oz bread flour
2 g / .5 tsp instant yeast

Baking Day
1 lb 4.75 oz white bread flour
8.75 oz corn flour
1 lb 13.5 oz poolish
8.75 oz 90˚F water
8.75 oz roasted pumpkin (see below)
2.25 oz extra- virgin olive oil
1.5 oz honey
25 g / 3.5 tsp fine sea salt
5 g / 1.25 tsp instant yeast

Combine your flours in your large mixing bowl. In another bowl, mix your poolish, water, roasted pumpkin, olive oil, and honey, and remember to keep that water warm to give your yeast a comfortable atmosphere to grow. Swirl those ingredients around with your hand to combine. Then, dump your flours on top of the liquid ingredients, and mix it by hand for about 30 seconds until it comes together in a shaggy mass. Don’t forget to scrape the bottom and sides of the bowl regularly; you want all of that flour hydrated and don’t want to see any dry spots. Set aside in a warm place, at least 80˚F, for 30 minutes.

Sprinkle the salt and yeast on top of the dough, which will have developed a good deal of strength by now. Grab a four-finger pinch of the dough and pull. It should stretch out like chunky taffy rather than just tear off. Incorporate the salt and yeast into the dough while continuously pushing the sides of the dough into the middle while turning the bowl. After a minute of this, the dough should be pulling away from the sides of the bowl and developing a bit of a sheen, and you shouldn’t feel any crunchy salt crystals. Cover the bowl, and put it in your warm place for 30 minutes.

Turn your dough onto a lightly floured surface and give it your four-fold by gently patting it out, folding the left side into the middle, the right side overlapping the left, the top into the middle, and finally the bottom overlapping the top. It should make a tight little package – this is how we’re building the dough’s strength, and after every fold the dough’s volume should increase. It should consistently feel warm and active. Roll the dough over and place it, seam side down, back into the bowl. Repeat every 30 minutes (you’ll fold the dough three times in total) until the dough is strong but puffy, warm to the touch, and holds a fingerprint when pressed into the surface. The whole process will take about 2 hours with a warm kitchen and warm dough.

Once your dough is ready to cut, turn it out onto your floured work surface. Using your bench knife and scale, divide into three l lb 10 oz pieces. Gently pre-round the dough into rounds, being careful not to compress the dough too much, and place seam side down on your work surface. Cover and rest for 20 minutes to build a bit more strength into the loaf before final shaping. Dust three bannetons/smooth towel-lined bowls with corn flour. Then take your rested rounds and gently but firmly shape them into rounds again. If your seams feel like they’re coming undone when you lift the loaf up, give it a few minutes sitting seam side down on the table to seal it and next time, use less flour for shaping. The dough’s moisture should be enough to seal the loaf closed. Place your shaped loaves seam side up in your bannetons/smooth towel-lined bowl,s cover with a cloth or plastic wrap, and place in your trusty warm spot.

While your dough is proofing, place your baking stone on the lowest rack in your oven, and your cast-iron pan on the highest rack. Preheat the oven to 450˚F. Check in on your bread periodically; if the surface feels dried out, spray it with a bit of water to allow for maximum expansion. If it feels cold, make it warmer. This may take up to 2 hours depending on the conditions of your kitchen; remember, proof to a result, not a time. If it doesn’t feel ready to bake, it probably isn’t. The loaf is ready to go in when it feels very airy and holds a fingerprint when pressed into the surface.lip the loaves over onto your peel. It might take couple of batches to bake all your bread, depending on your oven size. Using a sharp paring knife or a razor, slash the surface of the loaves in your desired pattern. Now grab three ice cubes from the freezer.

Being careful not to keep the oven door open too long and let the heat out, open the oven, slide your loaf onto the stone, throw the three ice cubes into the cast-iron pan, and close the door. After 5 minutes, quickly open the door and spray the interior of the oven with water. Continue baking until the loaf is evenly browned, about 25 minutes, and has a nice hollow when you tap it on the bottom. Let cool for at least 1 hour before cutting.

Roasted Pumpkin
The best pumpkins for this recipe are the smaller ones called sugar pumpkins. Choose those that are 8 to 10 inches in diameter. Wash any remaining field dirt off the surface, and knock the stem off with a hammer, the side of your table, or the back of a chef’s knife (careful with that last one). Bisect the pumpkin top to bottom (starting at the stem), and scoop out the seeds. Place the two halves cut side down on a sheet pan and roast at 400˚F until the skin starts to collapse and a skewer passes through the flesh easily, 45 to 60 minutes. Let cool, and then scoop the roasted flesh off the skins. Refrigerate until ready to use. Remember to warm the pumpkin to room temperature before using in this recipe (or else you’ll sandbag your dough temperature), and squish it through your fingers to smooth it out a bit before incorporating it into the other ingredients.

Concord Grape Pie from Baking By Hand

Concord Pie from Baking By Hand

When we opened the bakery in 2006, we spent two years living with Jackie’s parents while our big small business gamble got off its feet. Jackie’s dad, Tom, has a green thumb that would make leprechauns jealous.

Part of his Babylon-esque garden is a twisting vine of Concord grapes that strangles the fence near the back shed, and we wondered out loud at work what we should do with all of the beautiful fruit it was producing.

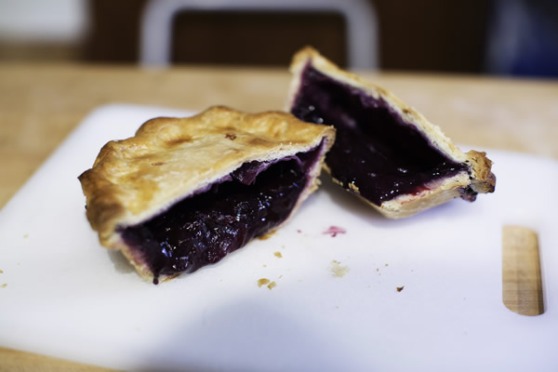
Our first full-time baker and full-time locavore, Sarah, introduced us to this quintessentially New England treat. If you have kids, get them to slip the skins off the grapes. It’s easy to do, will get their hands a little sticky (that’s a selling point for kids), and you can accept it as pre-payment for the best little pies the early fall has to offer.

Concord Grape Pie
Makes four 5-inch mini pies

The Crust: 3-2-1 Pie Dough
21 oz very cold all-purpose flour
2 1/2 tsp sea salt
14 oz very cold unsalted butter
7 oz ice water

Concord Grape Filling
27 oz stemmed Concord grapes
8.75 oz granulated sugar
4 tbsp all-purpose flour

Egg Wash, one egg beaten with a fork and splash of water added

For the crust:
Combine the cold flour, salt, and the butter in a large bowl. Using your fingers, begin to pinch and combine the butter and flour, making sure not to hold the butter in your hands too long. Keep working the flour and butter between your fingers until the largest pieces of butter are no smaller than peas. The key is to keep this mixture as cold as possible, and if you feel that it is warming up too much (or you are interrupted), you can refrigerate it to firm up the butter again.

Add the ice water to the flour-butter mixture, and toss together with your fingers, eventually pressing it together with your hands. You want a dough to form with no dry patches or crumbly parts, but you do not want to overwork it so much that you break down the butter completely or start to develop the flour’s gluten. Otherwise you will lose flakiness and your dough will become tougher. You want to see streaks of butter running through the dough. Press it into a 1” thick disc, and wrap in plastic. Chill for at least 1 hour or overnight.

When cold, roll the dough out to about 22 x 18 or about 1/8 inch thick and using a 6-inch cutter cut 8 circles. Line four 5-inch mini pie pans with circles of dough, pressing it into the sides and corners and trimming any excess off along the edge. The dough edge should go all the way to the edge of the lip of the pan. Chill the lined pans and remaining dough circles until the filling is ready.

For the filling:
Slip the skins of the grapes off the pulpy interior. Collect the green pulp, seeds and all, into a heavy bottom pot, and reserve the skins off to the side. Heat the pulp gently over medium heat and then turn to high heat to achieve a boil. Boil for 3 minutes to soften the pulp, stirring to prevent scorching. Strain the pulp through a wire-mesh sieve, pushing all the pulp through and discard the seeds. Add the skins to the pulp and stir. Refrigerate for up to 1 day, or move on to the next step.

(If reheating from the refrigerator, reheat the filling to a boil and remove from the heat.) Mix together the sugar and flour and then add it to the hot mixture. Stir to break up clumps. Set aside to cool to around 100˚F before using.

Assembly:
Preheat the oven to 450˚F.

Fill the chilled pie bottoms to just below the rim with the warm filling, and egg-wash the rim where the top crust will connect to the bottom. Place the top crust on the filled bottom crust, and crimp the edge into decorative points by putting the index finger and thumb of your non-dominant hand together and then taking the index finger of your dominant hand and pressing it into that space to create points with the dough. Trim the excess dough off the sides of the pan after crimping. Cut three or four slits in the top of the crust, then move on to the next pie. When all are complete, egg-wash the top crusts, place all pies on a sheet pan, and place the pan directly on the baking stone. If it takes you a while to crimp each one it may be wise to put each one in the fridge while you finish the others just to keep the dough from melting. You can egg-wash them before or after refrigerating.

Bake for 25 minutes on the baking stone, rotating after 12 minutes. Move the pies to a higher shelf, and continue baking for 15 to 20 minutes, or until you see the filling bubbling and the crust is a uniform dark golden brown. Let rest 5 minutes in their pans before removing from the pans with an offset spatula. Be careful to release any stuck edges before lifting from the pan. Let cool for 1 hour or more before eating. The longer you wait, the more set the filling will become.